Create an Image classifier from scratch without neural nets — Part 1

Whenever we think of creating an image classifier we straight away think of training a convolution neural net(CNN) containing different layers. We perform three famous steps of extract, fit and predict and we are done in most of the cases. But, in this case, we really don’t understand a few things which happen behind the scene:
1). How exactly are images interpreted by computers?
2). How do computers differentiate between the different classes of images?
We know that CNNs are really good at differentiating images but if we have to take a step back and think about how it can be done without them. We will understand and create the basics of image recognition. We will be able to create a method that can act as a baseline for all the classifiers you will build on that particular dataset by a neural net of your choice.
For this particular task, we need to have nothing more than the basic knowledge of Python, NumPy vectors, PyTorch tensors and some basic mathematics.
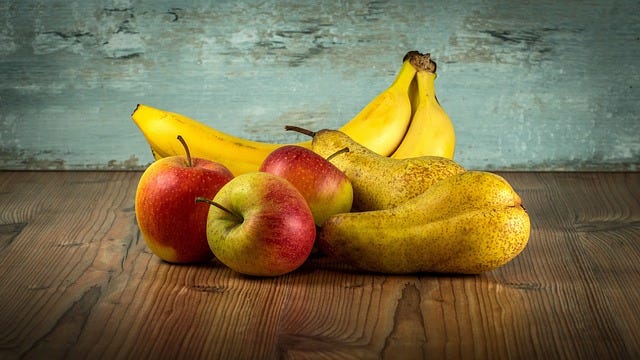
In this tutorial, we will create a binary classifier that can classify the images of apples and bananas.
Note: This tutorial is based upon fastai course v3 chapter 4.
Step 1: First we need to decide upon a dataset. For simplicity purpose its best to use a dataset which is in greyscale and we will understand the reason later. But, you can start with any dataset of your choice. I have used a fruit dataset I exported from Kaggle. The dataset contains images of apples and bananas.
Step 2: Load the dataset on google drive if you are using Colab or the respective folder if you are using any other platform or doing it locally on your PC. As we do while training CNNs it's best to have images in two folders of train and valid.
Step 3: Next, I took the training dataset and assigned the apple images to a variable named ‘apples’ and banana images to a variable named ‘bananas’.

As we can see the apples and bananas variable contains a sorted list of the images files of apples and bananas. We can also display an image using the Image library of python as given below.

The code used is very simple as we just extracted the element of the apple list and opened it using the Image. open command.
Step 4: Next, we will see how the computer sees these images. For this purpose, we will convert the image to either a NumPy array or a PyTorch tensor.


As shown above, both the NumPy array and PyTorch tensor of the chosen images are 3D matrices containing pixel values as 8-bit unsigned integers. The pixel values range from 0 to 255 being maximum. We are seeing only 255 in the array cause we are just seeing a section of the image array.
Step 5:Now, for the simplicity of this tutorial we will convert this coloured image to a greyscale image so we have to deal with 2d arrays instead of 3d arrays.


as we can see above changing the image from RGB to greyscale changes the image array and tensor from 3D to 2D. Or we can say the PyTorch tensor is changed from a rank 3 tensor to a rank 2 tensor.
Step 6: Now, we can slice a part of the array to see how the top part of the image looks and then we will colour code it using pandas data frame to see how computers convert an array to an image.

I have only taken a segment of the array and if we display it we will see a result like this

This image is really big. So if we take a small number of pixels we won’t see any difference. But, as you can see in the above image I have taken a very big chunk of the array and it just shows us only the top branch. As you can see whitish pixels are of smaller value closing towards 0. Completely black ones are near 255 and gray ones are in between.
Step 7: Next we will do pixel similarity. Remember our original dataset was a coloured one. So, we will convert it to greyscale and resize all the images to (255,255) so that they all can be stacked one over another as a tensor.

So, the idea here is that we will stack all the images of size(255,255) in a rank 3 tensor and will take an average of all the pixels in the tensor and that will give us an image which will be the average apple image of the dataset and will help us to classify.
Step 8: Since we now have the images as tensors which jupyter by default will show as numbers we will use fastai’s show_image function to display this tensor as an image.

Step 9: Because we want to take the average of all the images we need to stack this 2d tensor into a 3d tensor or a tensor of rank 3. We will also need to take the mean of these pixels so we will convert it to float. Generally when image values are floats they are expected to be between 0 to 1, so we will divide by 255.

Step 10: Now we can calculate what the ideal fresh apple looks like. We will take the mean of all the pixels of an apple image along axis 0, which is the index axis.

According to this dataset, this is the ideal fresh apple! (You may not like it, but this is what peak fresh apple performance looks like.) You can see how it’s very dark where all the images agree it should be dark, but it becomes wispy and blurry where the images disagree. It is blurry because it is the superimposition of some 300+images. Next, we will do the same for banana

This does not look like a banana at all. Because it is the average of all the bananas in the dataset and the different areas in it.
Summing up: So far in this tutorial, we have learned the following things:
1). How to create a NumPy array or Pytorch tensor of an RGB image.
2). How to convert an RGB image to greyscale.
3). How to do pixel similarity
4). How to get an average image from a dataset of images from classification.
Don’t worry there is a lot of fun left. Do check out Part 2 where we will see how we will use these blurred average images of apple and banana for classifying images and we will also calculate the accuracy of our classifier.
This is one of the very first blogs of my ML career. Kindly provide constructive feedback. It will be helpful for me in improving the quality of my content.
Sources:
1). https://course.fast.ai/videos/?lesson=4
2). Cover photo source: https://miro.medium.com/max/640/1*s6hB0AC-dS0h5qZIuE4zkA.jpeg
3). https://docs.fast.ai/